
Setup 3 of 14
Add a read-only user to Google Search Console
When Get1pct can read your Search Console numbers, your edits are based on real impressions and clicks. All you do is add the address shown in your dashboard as a Restricted (read-only) user. We don’t change your site or your Search Console settings.
- Required?
- Optional
- Where you do it
- Google Search Console
Before you start
- Permission you need: Owner of the site’s Search Console property. Only owners can add users. If you aren’t an owner, send this page to the person who is.
- Ownership check: if you haven’t connected WordPress, first add the ownership line to your home page.
- Not using Search Console? This step is optional. You still get edits based on the content of your pages.
If Search Console is in English
The clicks are the same in every language. In English, the path is:
- Open Google Search Console and select your site in the property menu at the top left.
- At the bottom of the left menu, click Settings, then Users and permissions.
- Click the blue Add user button.
- Paste the address into Email address, change Permission from Full to Restricted, and click Add.
The screenshots below show Search Console in Japanese. Each caption gives the Japanese label you see in the picture and, in brackets, the English label you will see if your Search Console is in English. The buttons are in the same places.
Steps with screenshots
Step 1Copy the address to add
Open Connections in your dashboard. Under “Connect Google data”, click “Copy” next to “Address to add”.
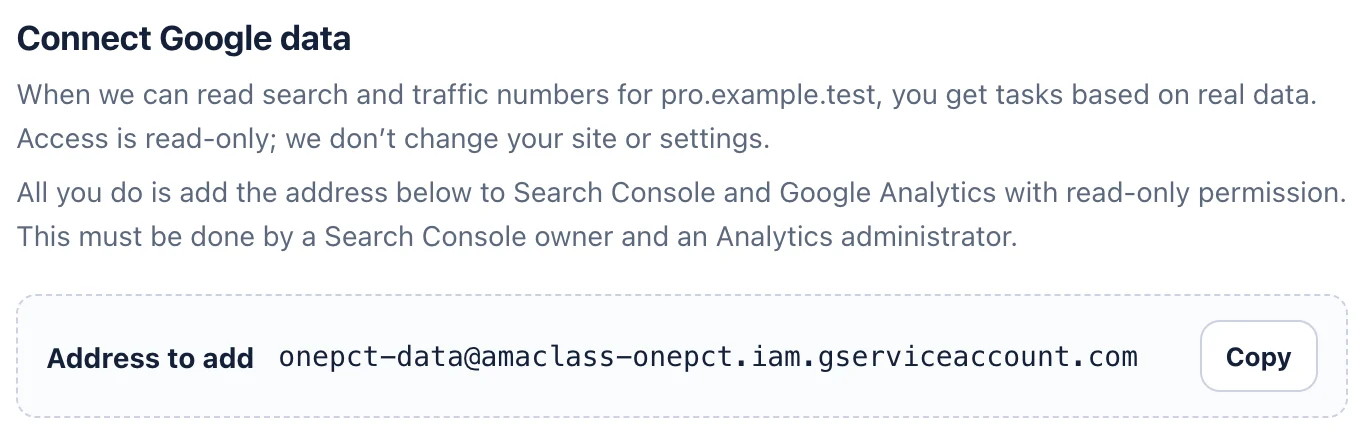
- The address you need is shown under “Address to add”.
- Click “Copy”.
Step 2Select your site in Search Console
Open Search Console.
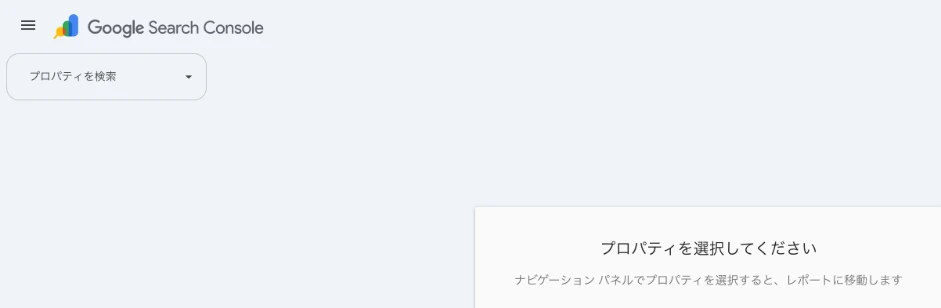
- If you see “プロパティを選択してください” (Please select a property), click the property search box at the top left (“プロパティを検索” / “Search property”) and choose the site you want to connect.
If your site is registered both as a Domain property and a URL-prefix property, adding the address to either one is enough.
Step 3Open Settings, then Users and permissions
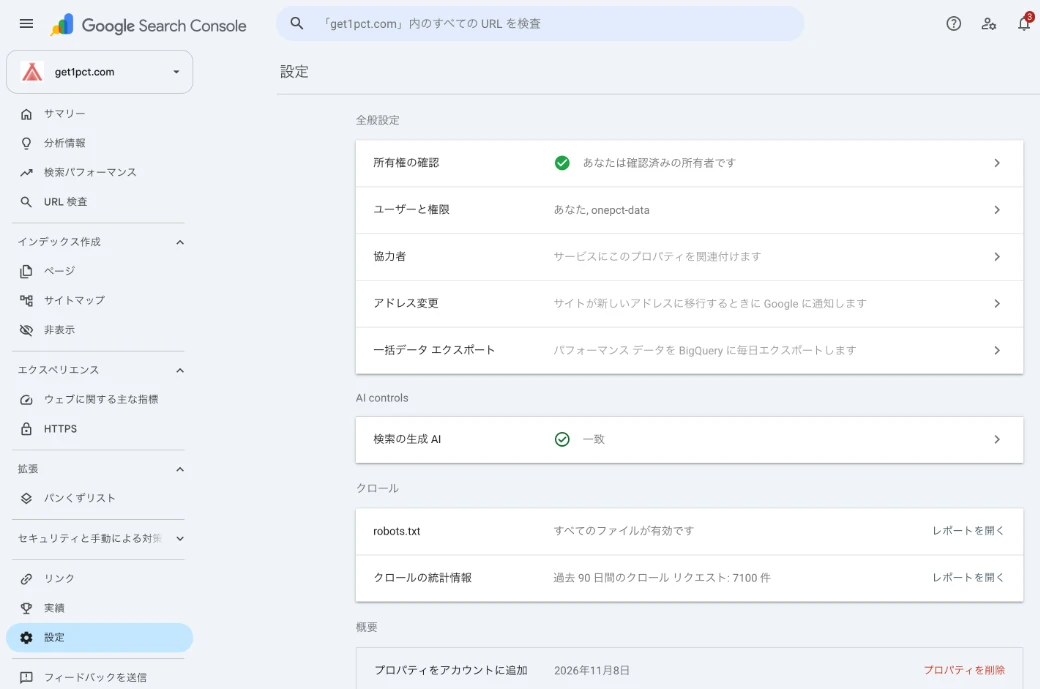
- Check that the site you want to connect is shown at the top left.
- Click “設定” (Settings) at the bottom of the left menu.
- Click “ユーザーと権限” (Users and permissions).
Step 4Click Add user
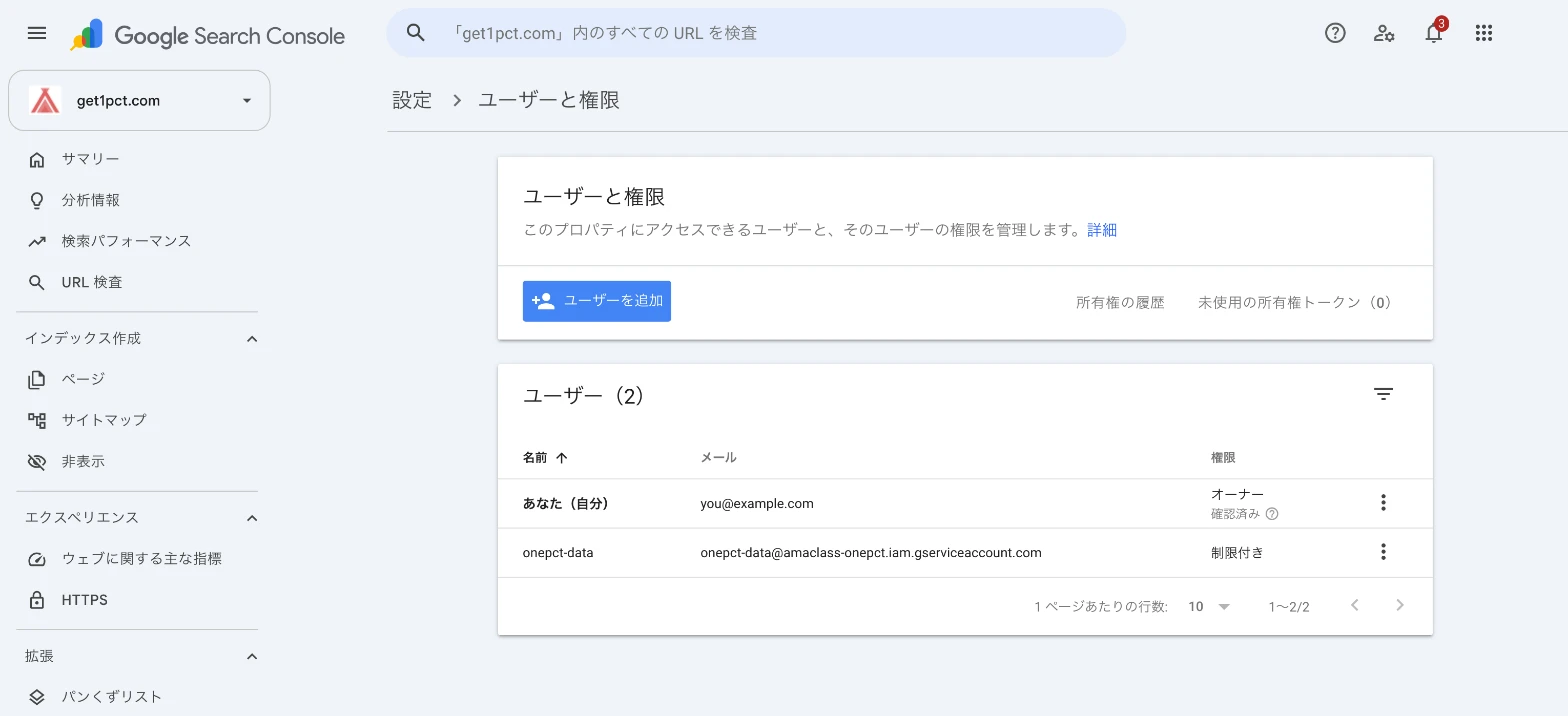
- Click the blue “ユーザーを追加” (Add user) button.
Step 5Paste the address, set the permission to Restricted, and add
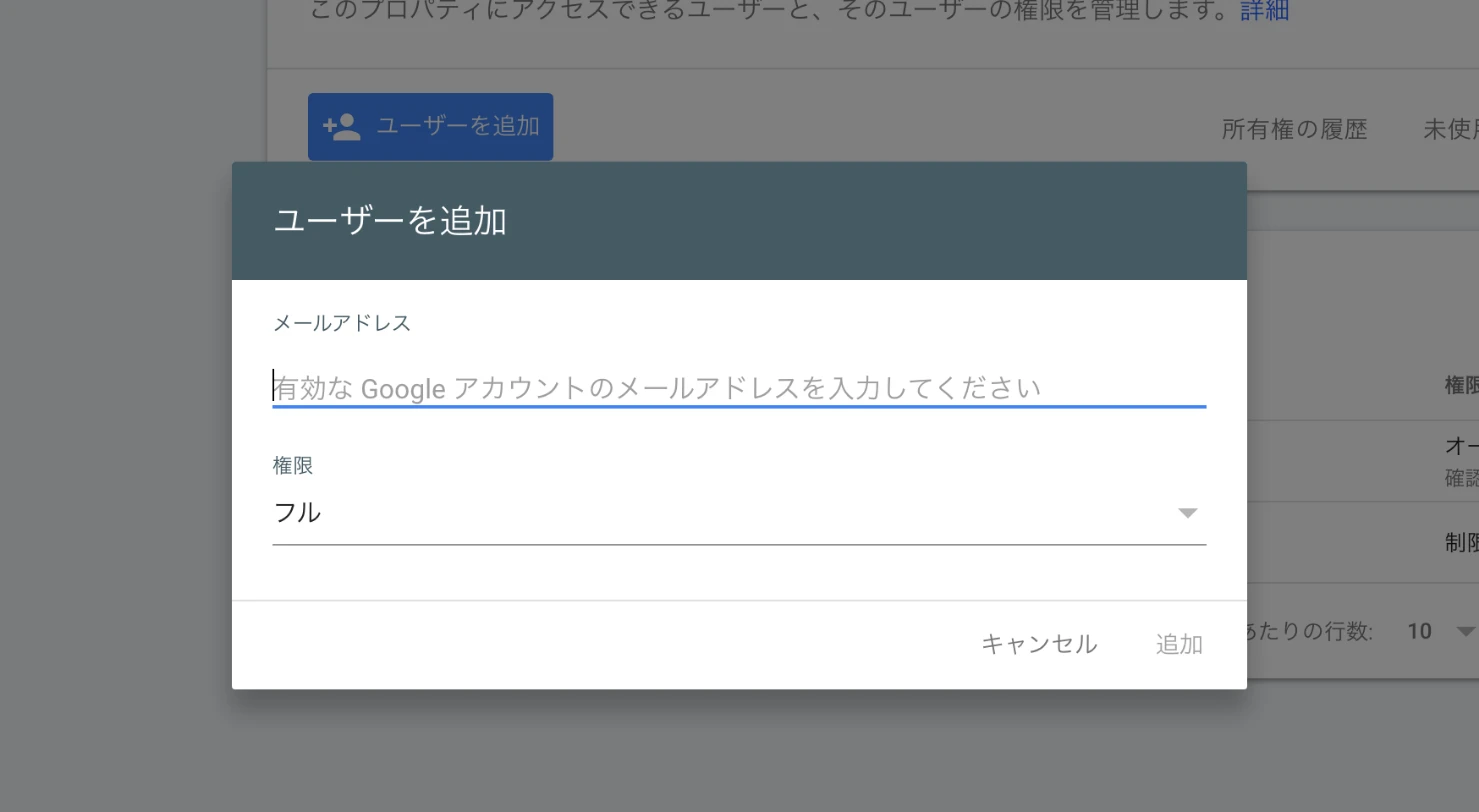
- Paste the copied address into “メールアドレス” (Email address).
- Open “権限” (Permission) and change it from “フル” (Full) to “制限付き” (Restricted).
- Click “追加” (Add).
Restricted is enough. It can only read the numbers; it cannot change your site or your Search Console settings.
Step 6Check that the address is in the list
- You are done when the address appears in the list as “制限付き” (Restricted).
Check that it worked
Go back to Connections in your dashboard and click “Check that it was added”. When the label next to Search Console changes to “Confirmed”, you’re done. Search numbers are used from the next morning’s edits.
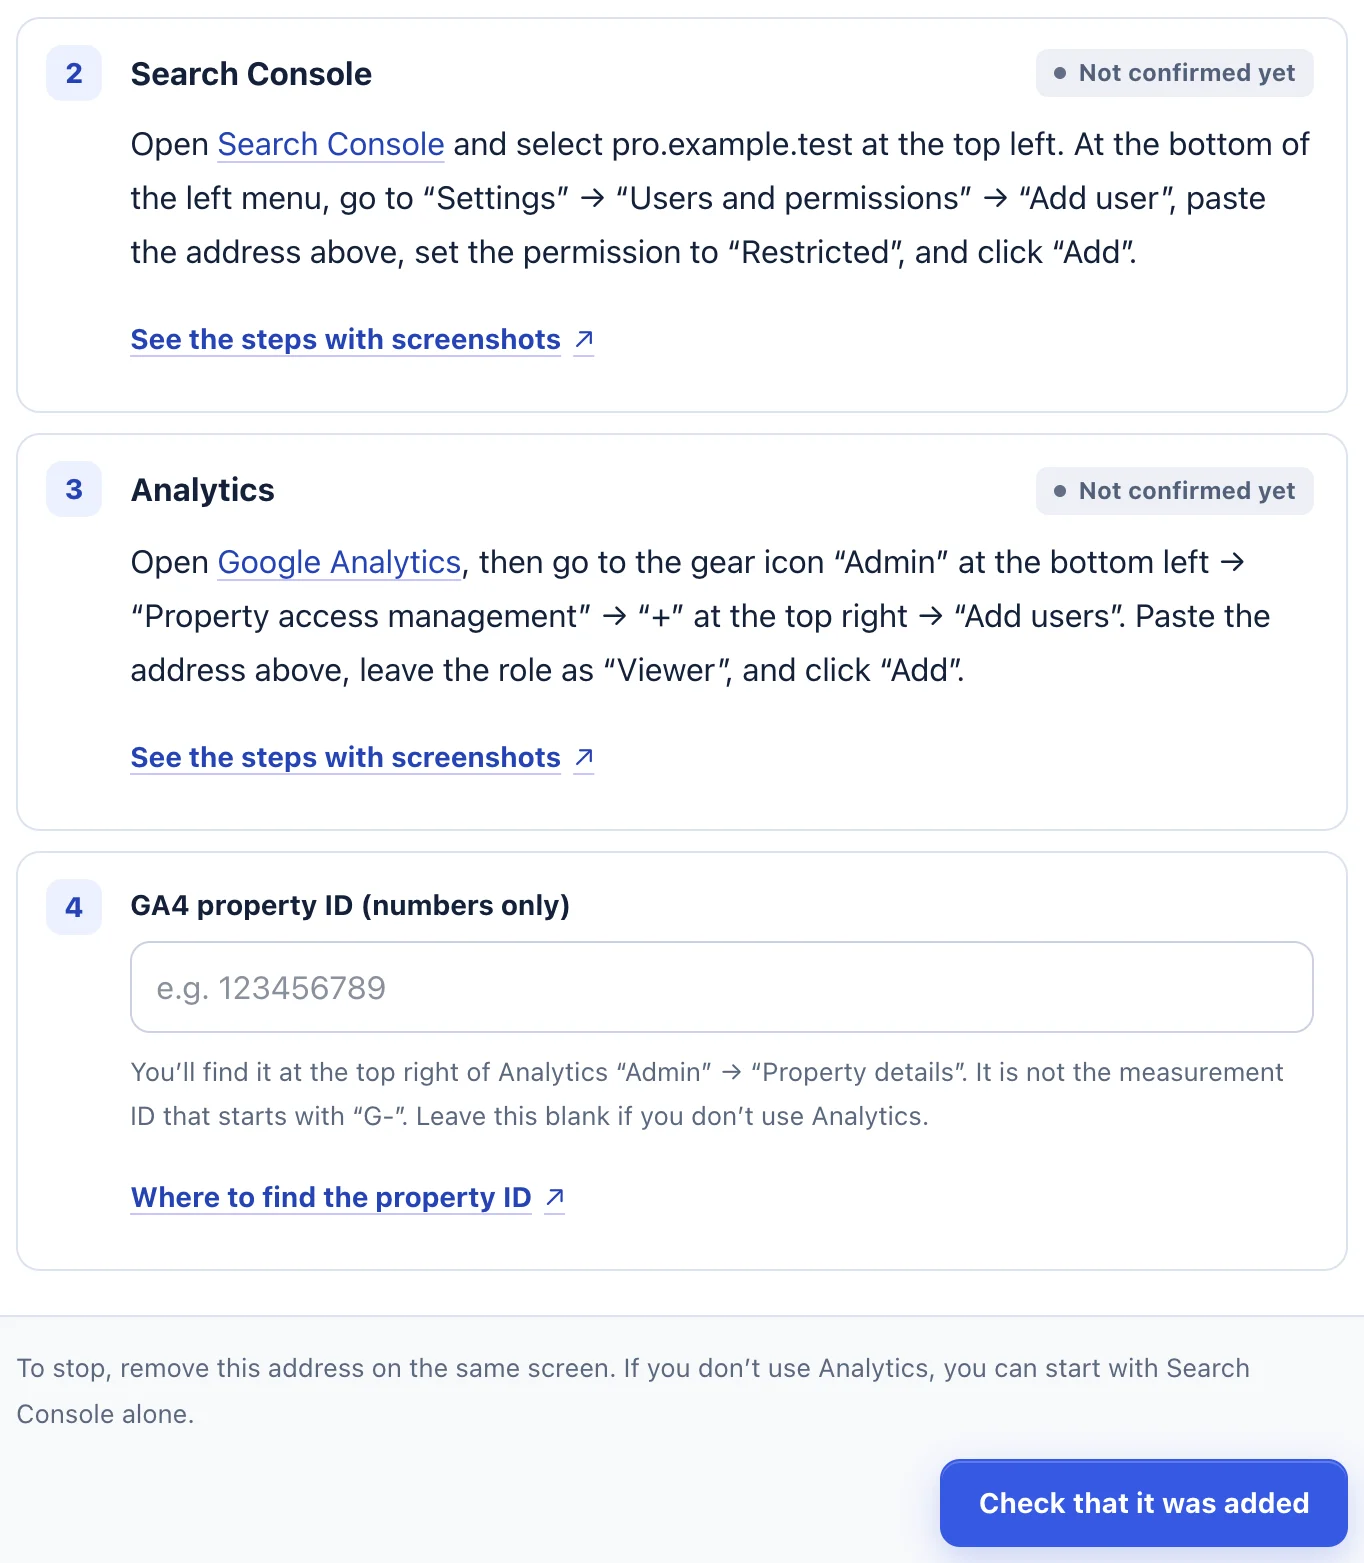
- Click “Check that it was added” at the bottom.
- You are done when the label next to each step changes from “Not confirmed yet” to “Confirmed”.
Troubleshooting
- It says the ownership tag on your home page couldn’t be found
- The ownership check isn’t done yet. Make sure the ownership line is in the head of your home page and that the change is published.
- It stays at “Not confirmed yet”
- Check that you added the address to the property for this site and not another one, and that you pasted the whole address. If you just added it, wait a little and try again.
- There is no Add user button, or it can’t be clicked
- You’re signed in with an account that isn’t an owner. Ask a person listed as Owner under Users and permissions to add the address.
- It says there were too many attempts
- There is a limit on how often you can check. Try again in about an hour.
- It says the site is connected with another account
- The same site is connected under a different login. Adding the ownership line lets you move the connection to your current login.
To stop
In Search Console, go to Settings → Users and permissions, click the three dots (⋮) next to the address you added and choose Remove access (“権限の削除” in Japanese). We can’t read the numbers from that moment.
If the steps don’t match what you see, contact us with your site URL and the screen where you got stuck. Please don’t send passwords.